 11
11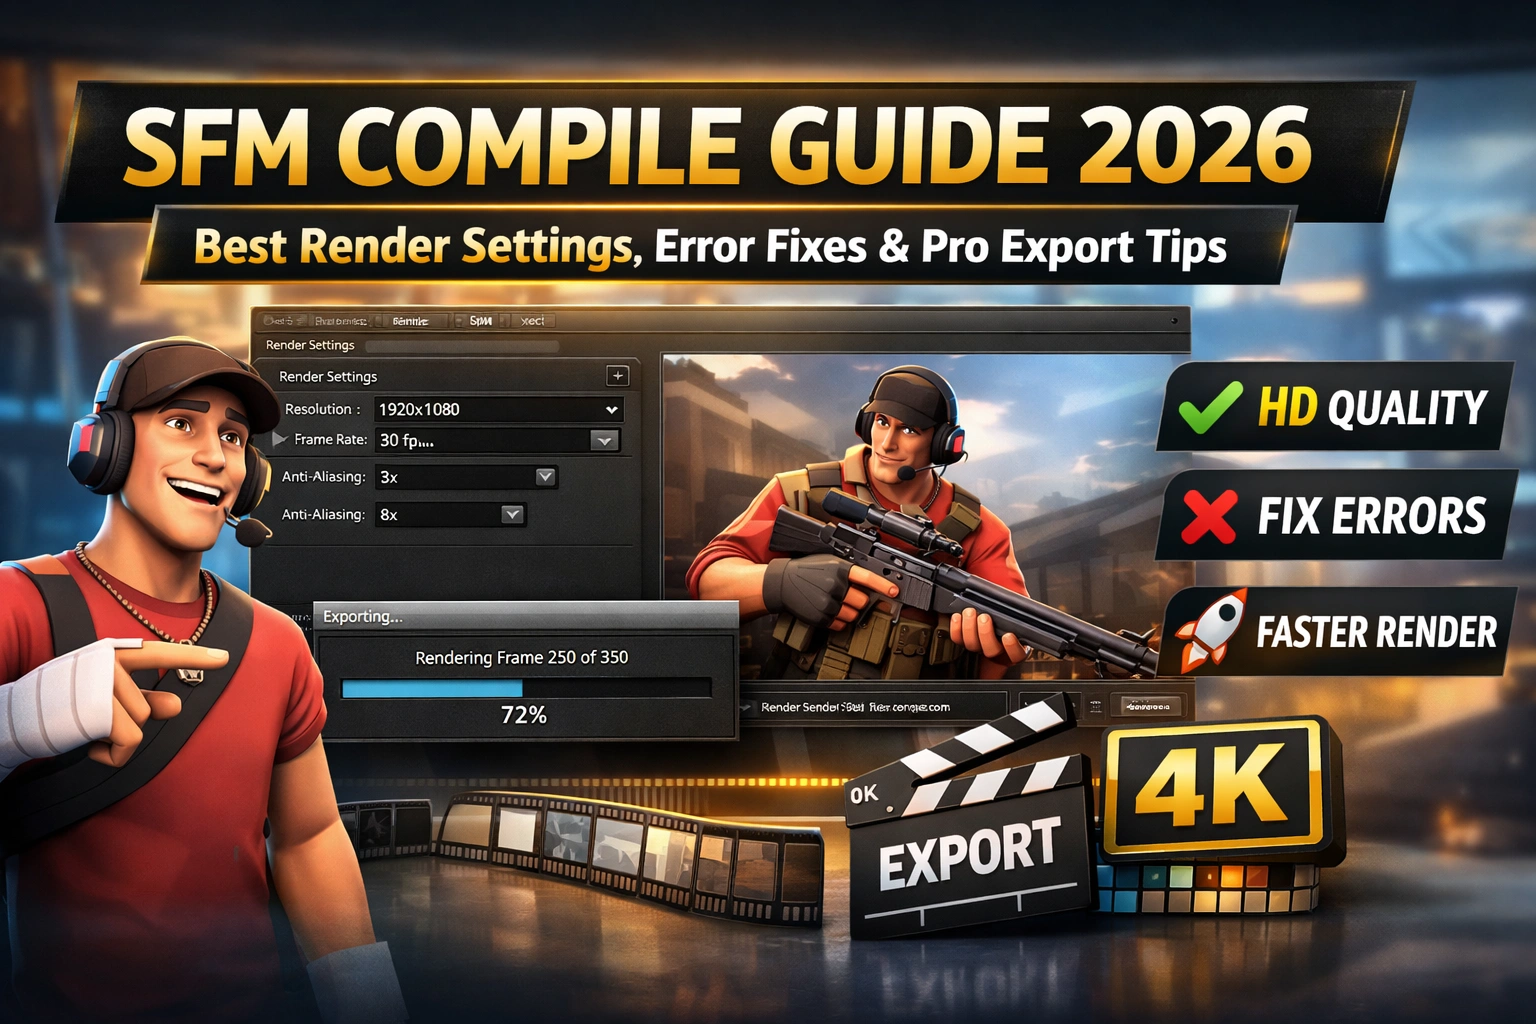
If you create animations in Source Filmmaker, you already know how exciting it feels to bring characters to life. But your work is not finished until you export it properly. That final step is called sfm compile, and it is very important. Without proper compiling, your animation may look blurry, laggy, or broken.
Many beginners struggle with this step. I did too when I first started using Source Filmmaker. My early videos had low quality and missing audio. I did not understand the right settings. Over time, I learned how to use sfm compile correctly. In this guide, I will share everything in simple language. You will learn how to compile videos, fix common errors, and improve quality. By the end, you will feel confident exporting your projects the right way.
SFM compile is the final process of turning your animation project into a video file. Think of it like baking a cake. You mix all ingredients first. Then you bake it. Compiling is the baking step.
In simple words, sfm compile takes your timeline, lighting, camera angles, sound, and effects. Then it combines them into one playable video. This video can be shared on platforms like YouTube or social media.
When you skip proper compile settings, the final video may look darker or blurry. Audio may not match the animation. That is why understanding sfm compile is important. It controls the final look of your project.
Many new creators rush the export process. They click default settings and hope for the best. Sadly, default settings are not always perfect.
The right sfm compiles settings improve video clarity. They also help reduce file size without losing quality. This is important if you upload content online. Big file sizes take longer to upload.
When I improved my compile settings, my videos looked more professional. The colors were brighter. The motion was smoother. Viewers noticed the difference. Proper compiling shows that you care about quality.
Let us break it down into easy steps.
First, open your finished project in Source Filmmaker. Double-check your timeline. Make sure there are no missing frames.
Next, go to File and click Export Movie. Choose your export format. Many users prefer image sequence export. This gives better control.
Select resolution. For most videos, 1920×1080 works best. Set frame rate to 24 or 30 FPS. Then choose your output folder.
Finally, start the sfm compiles process. Wait patiently. Do not use heavy programs during compile. It can slow down rendering.
Quality depends on resolution and anti-aliasing settings. Always choose high anti-aliasing if your PC supports it. This removes jagged edges.
Use 1080p resolution for YouTube uploads. If your system is strong, you can try 4K. But remember, higher resolution means longer compile time.
Set motion blur carefully. Too much blur can hide details. Keep it balanced. Proper sfm compiles settings make your animation look cinematic.
I personally test short clips first. This helps me check quality before exporting the full video.
Sometimes the compile fails. Do not panic. It happens often.
One common issue is black screen output. This usually means lighting errors. Check your scene lights.
Another issue is missing textures. This happens if model files are not installed correctly. Reinstall the assets and try again.
If sfm compile crashes, reduce render settings. Lower anti-aliasing or split your project into parts. Small changes often fix big problems.
You have two main export options.
Exporting directly as MP4 is faster. It is good for quick uploads. But image sequence export gives better control.
Image sequence saves each frame as a picture. Later, you combine them using video editing software. Many advanced users prefer this method.
In my experience, image sequence makes sfm compiles more stable. If one frame fails, you only fix that frame.
Rendering can take hours. But you can speed it up.
Close background programs. Free up RAM. Lower shadow quality slightly. These small changes help.
You can also render in smaller sections. Then combine them later. This reduces system stress.
Upgrading hardware also helps. More RAM and better GPU improve sfm compile performance.
Audio problems are common. Sometimes sound does not match animation.
Before exporting, play your timeline fully. Check lip sync and background music timing.
Export audio separately if needed. Then merge it during editing. This ensures perfect sync.
Proper sfm compile settings keep your video smooth and professional.
Once your video is ready, upload it wisely.
Choose correct format like MP4 H.264. This works best for YouTube.
Write a strong title and description. Add tags like SFM animation tutorial, Source Filmmaker rendering, and gaming animation.
Good compile quality improves viewer retention. People watch longer when videos look clear.
Use depth of field carefully. It adds cinematic feel. Adjust lighting for mood. Small lighting changes improve final output.
Test short clips before full export. Always preview your render.
Keep your project organized. Label cameras and scenes clearly. Clean workflow makes sfm compile easier.
With practice, your compile process becomes faster and smoother.
When I started, I did not understand render settings. My videos looked grainy. Viewers gave feedback.
Instead of quitting, I studied tutorials and tested settings. Slowly, I improved. Today, I always use image sequence export for important projects.
The biggest lesson I learned is patience. Sfm compile takes time. Rushing causes mistakes. Careful exporting creates professional results.
1080p is best for most creators. It balances quality and file size.
It may be due to high render settings or low system memory. Lower settings and try again.
Yes, if you want better quality control and stability.
It depends on video length and PC power. Short clips take minutes. Long videos may take hours.
Yes. You can edit your exported video in editing software.
Check resolution and anti-aliasing settings. Increase quality settings before exporting.
Learning sfm compile is not hard. It just needs patience and practice. When you understand settings, your videos improve greatly.
Take time to test different options. Focus on lighting, resolution, and export format. Small improvements make big differences.
If you want professional animation results, never ignore the compile step. Start applying these tips today. Improve your workflow. Create better videos. And most importantly, enjoy the creative process.